
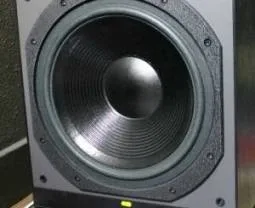
Components, a little imagination – and a custom piece in your hands
To make a custom piece with your own hands, namely a subwoofer, you will need a pair of low-frequency drivers. These drivers must be the same size, but it is not necessary that both are operational.
For example, one of these drivers may have a burnt coil. It would be ideal if the drivers are of the same type, for instance 75ГДН.
You will also need a good quality board, its thickness should be 150-200 mm. The width of the board should have a margin of two thicknesses relative to the size of the driver head. In addition, you need to get a batten with a cross-section of about 30 by 30 mm and shoe glue; “Moment” glue will do. It is better not to use epoxy resin for these purposes, as it lacks elasticity. You will also need several self-tapping screws, a couple of bolts with nuts, their length should be approximately 4-5 cm.
Naturally, this work cannot be done without using a hacksaw, ruler, pencil, drill, screwdriver, powerful soldering iron, and pliers are also needed. You will also need a low-frequency generator; however, it is sufficient to use the one built into a digital tester, with a frequency of about 50 Hz. And, of course, you must have the necessary skills.
Manufacturing
First, you need to make a box. It should be about a meter long, and its internal dimensions should ensure a tight fit of the driver head. The entire structure is assembled using self-tapping screws on glue.
Now you need to attach the driver. For this, four bars are made from the batten, and the entire structure is joined using glue and self-tapping screws.
The next step is making electrical contacts. For this purpose, wires are soldered to the bolts; however, it is sufficient to simply press them with washers. Two holes are drilled in the housing for these bolts, they are fastened with nuts, threads outward, as shown in the figure. The wires are placed inside the housing.
Now you need to work on the head of your driver. First, take the head that is operational. Solder the wires to this head, the same ones mentioned above. Of course, this is not a mandatory condition, but it is advisable to mark the corresponding wires according to the polarity of the head. Now, using large screws through rubber washers (you can use plumbing gaskets), the head is attached to the previously prepared mount of bars to the housing.
Then you will need to seal the driver in the housing. You can use ordinary plasticine or window putty for this purpose. You can, of course, use cotton, but in that case you will encounter a deterioration in sound.
Now we proceed to tuning the subwoofer. To do this, connect an amplifier to the terminals. Apply a low-frequency signal to its input. Now slowly move the passive driver head inside the housing. Carefully listening to the sound, try to catch the moment of its highest volume. If you happen to miss such a moment, do not be upset. Simply pulling slightly on the prepared loops, start searching again. It is advisable to temporarily attach the small bars from the batten to the driver using screws so that the driver does not fall inside the housing.
When you finally manage to find the best position, remove the driver, having previously marked this place with a pencil. Secure the bars that serve as the driver mount also with self-tapping screws and glue, saw off the excess housing. Like the first one, secure this driver, do not forget about sealing.
To connect the system to the amplifier, you will need a low-pass filter. For example, you can take it from S90 speakers. This filter is placed inside the housing. If desired, you can use a separate amplifier with a low-pass filter for your subwoofer; its bandwidth should be up to 1200 Hz.
Well, that's basically it, your custom work is complete. Use your imagination, paint your subwoofer, you can varnish or stain it. Some cover the sides with fabric, painting some pattern on it.
_