
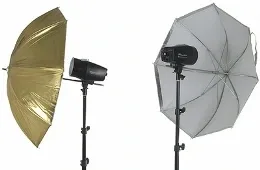
A softbox is an indispensable accessory in any photo studio.
An experienced photographer does not need to be told that “correct light” is necessary for full-fledged work. This term refers to soft, even, diffused light, which is rarely found in a natural environment. Such pleasant illumination occurs at dawn and dusk, on a cloudy day when clouds act as a huge diffuser. Even at the dawn of photography, enthusiasts noticed that in these conditions, pictures of people, nature, and objects turn out most natural. Since then, the invention of a portable light box was only a matter of time. Today, it is widely known as a softbox.
Amateurs and professionals have heard of this studio accessory, but not everyone knows how to use it most effectively in their work. In a light box, the flash output is reflected off the silver inner walls, passes through an inner and then an outer diffuser. The result is a soft, diffused light. Simple techniques for working with a softbox will help you achieve the desired effect, and often save on additional equipment.
It should be remembered that the larger the source (light sphere), the softer and more diffused the light will be. In practice, this means that using a small Falcon softbox, you can easily achieve the same effect as from a large one measuring 80x120. To do this, simply move it as close as possible to the subject.
For controlling the quality of lighting, it is useful to know another principle. The closer the light source, the larger it becomes. Many people think that if they move the light box back, the lighting will become softer and more even. In fact, the opposite effect occurs: the amount of light decreases, consequently, the contrast level increases, and using a softbox loses its purpose.
What does this mean in practice? If when constructing a light pattern you need to obtain a large highlight, you can use even a small diffuser by moving it as close as possible to the model. This way you can get out of a situation when a large softbox is in use or simply unavailable.
It is also useful to know about another interesting point called the "wraparound effect." When a large light box is very close to the subject, there is so much light that it literally wraps around the object, minimizing dark shadows. This effect can be simply explained using the example of the blazing sun: on a cloudless day, shadows are sharp, the light is quite hard and contrasty. But in cloudy weather, clouds act as a huge diffuser, making the light soft and shadows disappear. In practice, this means that to achieve extremely blurred shadows, you should place a large light box in close proximity to the subject.
Despite the fact that the tastes of photographers differ, sometimes even greatly, when it comes to studio lighting, they all agree on one thing: the bigger, the better. Therefore, before spending money on an expensive camera, take some time to study studio accessories. Contact a photo equipment store for advice – they will surely help and advise you on your questions. Studio tools allow you to achieve amazing results, you just need to learn how to use them effectively.
_